
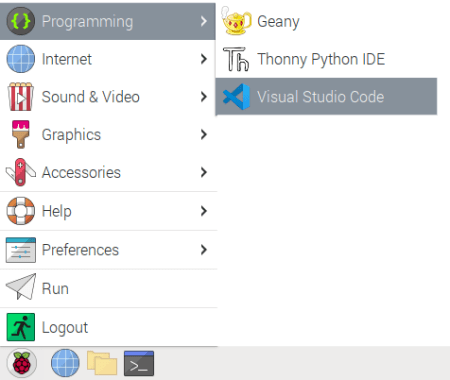
When it comes to a Python IDE (Integrated Development Environment) for the Pi, if you want to code like a pro, I would definitely go with Visual Studio Code. It’s free, open source, and runs on pretty much any platform. And no, I’m not getting any kickbacks from Microsoft. While the Raspberry Pi OS installation comes with a couple of IDE options, you will have a more pleasant (and efficient) programming experience if you use VS Code.
Before I go about the installation steps and some useful extensions that can be added, let me first mention two things that I believe can really make a difference for programming in Python: 1) A highly customizable interface that has the same look across different platforms; 2) You can have the editor, the terminal window, AND an interactive Python session all in a single interface. Even more than one instance of each, if that’s the case.

Installing VS Code
First of all, I strongly recommend keeping the default pi username that comes with the Raspberry Pi OS. It has the correct level of administrator privileges and will help keep things communized as we move forward. With that said, open a terminal window on your Pi and run the following commands to make sure the installation is current and to install VS Code:
pi@raspberrypi:~ $ sudo apt update
pi@raspberrypi:~ $ sudo apt install code
That’s pretty much it! But let’s add a few features to make life easier. VS Code allows for a multitude of extensions to be installed. In our case, Python IntelliSense (auto-completion, syntax checking, code formatting) and Jupyter notebook (interactive session, graph renderers) are really useful and should be installed next.
Let’s open VS Code and go to the Extensions Marketplace, as shown in ![]() below, and type python in the search bar. Several extensions will show up. Select the Python (Pylance) extension and
below, and type python in the search bar. Several extensions will show up. Select the Python (Pylance) extension and ![]() and install it.
and install it.
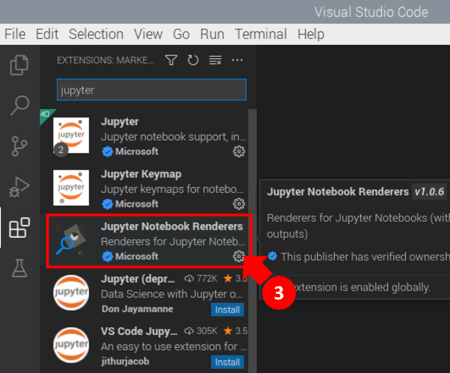
Then type jupyter in the search bar and install the Jupyter Notebook Renderers extension ![]() . Sometimes it’s installed automatically when you install the previous extension.
. Sometimes it’s installed automatically when you install the previous extension.

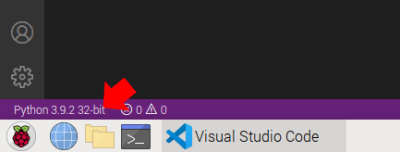
At this point you should be able to see the Python interpreter automatically selected based on the version installed on your Raspberry Pi.
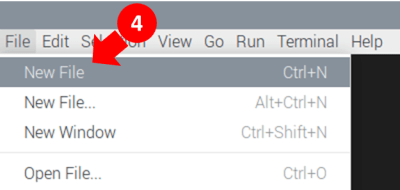
Let’s create our first program in VS Code, which will help understand the layout a bit more and install some additional requirements. As shown next, create a new file from the menu ![]() and then select
and then select ![]() Python as the programming language.
Python as the programming language.

Create a simple program, such as a variation of the famous print('Hello World!'), then right-click anywhere in the editor and select the menu option Run Current File in Interactive Window. That will trigger the installation of the missing piece (ipykernel) required to run interactively.

Accept the prompts that may appear in the lower right corner and/or the main window and wait as the installation opens a new terminal window in VS Code.
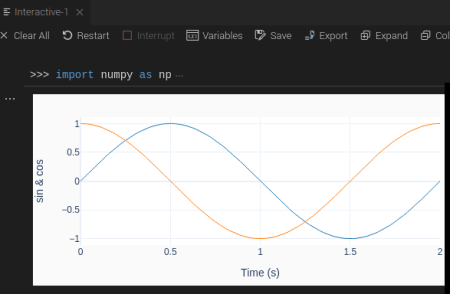
Once the installation finishes, the interactive session should be fully enabled and your screen should look somewhat like the one below. You can also type commands in the box at the bottom of the interactive window and execute them by pressing SHIFT + ENTER. For those familiar with MATLAB, the interactive window is very similar to the MATLAB Workspace. You can run bits and pieces of code, try individual commands, and manually inspect variables, among other things.

Installing Plotly
The next step is to install Plotly so we can make some graphs in the interactive window. By the way, I couldn’t find an easy way to have Matplotlib graphs show up in the interactive session in the Raspberry Pi Unix… Besides that, the graphs in Plotly are quite interactive, which is a nice feature to have. So, let’s open a terminal window in VS Code, as shown below:
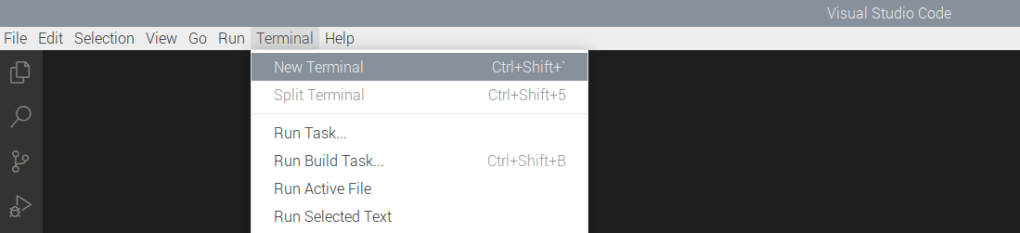
In the new terminal, do a pip install for Plotly. As you probably realized by now, Python packages can by installed from inside VS Code, without the need to run sudo apt install commands from the standard external Pi terminal.
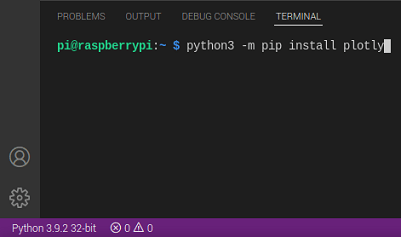


Finally, for things to work as expected, in the same terminal window, run a pip install for nbformat, a Plotly requirement.
At this point, close and restart VS Code for all the changes to take effect.
Numpy and Personal Preferences
To run some of the examples throughout my blog you will need to install a different version of numpy than the one that comes installed with the Raspberry Pi OS. While it doesn’t replace the original version, the new package will end up installed in the local python site-packages folder, more specifically: /home/pi/.local/lib/python3.9/site-packages. Which version of numpy to choose may be dependent on the Python version that’s running on the Pi. In my case, I run the following command at the VS Code terminal:
python3 -m pip install numpy==1.22
After doing that, numerical library issues will come up, which can be resolved by installing in a Pi terminal:
pi@raspberrypi:~ $ sudo apt-get install libatlas-base-dev
And since you’re at it, you might as well install a useful engineering package (through the VS Code terminal):
python3 -m pip install scipy

I also like to create a folder structure that will explicitly have a modules folder, which will be the location for any Python modules that I create.
That will work well if you use this VS Code settings.json file. It already has the correct folder names and a few more settings for how VS Code should look. You can copy it’s content from my GitHub page and place a file with the exact same name in home/pi/.config/Code/User. The current file in that folder should be empty if you just installed VS Code. In case it isn’t, you may want to save a copy of it with before replacing it with the new one. Open the new file with, yes, VS Code and make sure the Python folder matches the one on your Pi OS installation.
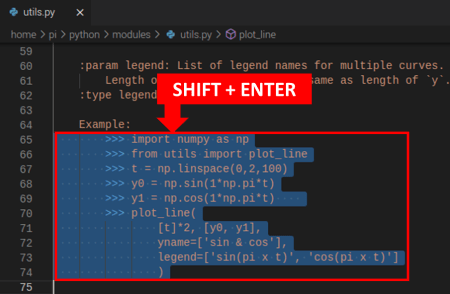
You can also get the keybindings.json file from the GitHub page and place it in the same folder. It allows you to open an interactive session window by pressing ALT+SHIFT+J , as well as to automatically run selected code from the editor in the interactive window by pressing SHIFT + ENTER .
Now it’s a good time to get the plotting function from my post A useful Python plotting module, that I use quite often in the examples, and place it in the correct location with the correct name. Just copy the code from the post and paste it in a new Python file in the VS Code editor. Then save it as utils.py in /home/pi/python/modules/ folder. If you inspect the settings.json file you’ll see that the modules folder is already added to the Python path and it’s content can be imported without any problems.

You can even run the example by selecting the code an hitting SHIFT + ENTER to have it execute in the interactive window. Give it a try!

One thought on “VS Code on Raspberry Pi”